Total Pageviews

Showing posts with label Shabby Chic. Show all posts

Monday, 9 January 2017

Cards and tags with Alphabet dies

Hello friends,
  today i have few projects to share using the new "Bold XL Alphabet dies".The size of the alphabets is 1 1/2 inches approx ,so it can be used widely on home decor and party theme projects.You can use it to create banners,wall art,cupcake toppers, stationery, invitations,the possibilities are endless with this one.
First one is shabby chic card.The size is quiet big for standard size cards,but you can use it if the sentiments is used as focal point .

Next one is alphabet tags.These are mini tags measuring 2 1/2 by 3 1/2 inches with alphabets on center.These can add a personal touch to any gifts.


Next up is a place card.Its a simple n quick one with a embossed panel,fancy border and few leaves and flowers. Doesn't the alphabet looks so bold and beautiful?i am just overflowed with ideas right now.So if you work more on party/home decor projects this die is a must have in your collection.

Supplies used:

Hope you enjoyed todays post.
Thank you for stopping by,
kavi


The website is updated with a new look and is ready to take orders from USA, Canada, Guam, Mexico, Australia and New Zealand, all other countries will be added soon. 
Thank you so much for playing along with us and have a great day. Please follow DCAM and the team on various social media platforms. 

Monday, 28 November 2016

Its a Girl!

Hello Everyone, Piyanki here today with a brand new card using the DCAM Stencil and dies. Its a very cute project and I thoroughly enjoyed creating it.

So before we proceed, hope you all are enjoying our current challenge. We have some amazing response till now and hope to see more.

So 2 days left for the challenge to close and you still have time so hop on HERE.


So now its turn for the project. I will explain in detail how I created this.


The final card measures 5.5x5.5. It has 3 layers. 

First layer is made with water color background. Used the DCAM Die " Its a Girl" and placed it diagonally. Later used shades of pink distress ink for the water color effect.

Once the layer is created, tore it and distressed the edge. For the second layer Used the DCAM Stencil to create a background with texture paste. Its a pink CS and hence did not color the background. Left it white textured.


Now for the center piece. I used the DCAM square die and die cut 10 pieces. Created a stack with 8 and then used the rest two after placing the sequins.

At the bottom stamped a baby stamp on a vellum sheet from my collection to add to the theme.

This way if you make any shaker its much easier and also the sequins would not stick to the sides.
The flowers, lace, trims are all from my collection.

 Later finished the card with some candy rock glitter and white splatter.

So do let me know how you like it. Share your comments.

You can find us:
Blog | You Tube | Facebook | Instagram | Twitter

Product Used:


Do join us at the ongoing challenge to win some DCAM goodies.


Monday, 21 October 2013

An Explosion Box !!

HOLA !!

Good Morning fellow crafters , followers and all the beautiful visitors, How you all doing ? Hope good :)
I hope you all are enjoying this month Challenge with us here at DCAM with all the amazing posts by my fellow DT'S.

Today I have an EXPLOSION BOX share with you all. First of all I would like to thanks Mansi di for coming up with an interesting challenge and fantabulous inspiration . When this challenge was announced I was very nervous and kept on thinking what will I do with WHITES .. hhehehe well with my first attempt which you can check here I managed to gain some confidence and VOILA here I am in LOVE with WHITE.
Have a look

                                             Here is my explosion box all in white and pinks .


Here is the close up of the lid . So many details here , I have did loads of misting and distressing here . This time I have gone crazy using my dies . Lace added on the edges have been misted using Mist-ries . Flowers are handmade badly madly hooked to flower making .


This is how my box looks like from inside .  Here also I have done loads of distressing . I tried to keep it simple and elegant but some how I always get carried away with it :P


Here is the close up of the center . Don't know what I was trying to do , All I know is its kind of shabby !!


Well that was all I have to share with you all . I hope I was able to inspire you all and don't forget to participate in our challenge , You might get lucky to win some goodies :)

P.S - this is my second ever explosion box please do leave me some love .


Have a nice day

Love and Hugs


SUPPLIES USED


Thursday, 19 September 2013

A Forever Card

Hi,
Good Morning everyone, its Sachi here and today is my turn for the DCAM Challenge Inspiration . I hope this card gets your creative MOJO going !


I started the card with the black linen textured card stock from Die Cuts & More , i think it gives a very sturdy base to a project.
Lots of intricate dies from Memory Box and Cheery Lynn have gone into this card !The delicate swirls and the gorgeous heart are all Memory Box dies , Die Cuts & More has an amazing and a huge collection of these beauties . And yes best of all the Cheery Lynn Sweet Williams strip,it a must add die if you love making handmade flowers .Here's a closeup-


The blooms have been  colored with Spun Sugar distress marker with the white center pollen from Die Cuts and More . Adding fine brush strokes is a lot easier with the distress markers.


I wanted to use this antique watch which i  fussy cut from the Prima Engraver Papers , apart from giving a vintage touch it also adds as an embellishment.The background on which the sentiment pieces have been stamped have been distressed with Frayed Burlap, Antique linen and some gesso.


I hope I have inspired you to make a shabby chic creation for our ongoing Challenge No 2#-Shabby Is Chic, so keep the awesome entries coming  . And let me know if you like my card , would love to hear from you . And don't forget to check the crafty supplies beneath .

Thanks for stopping by , Have a great day ahead !


Sunday, 15 September 2013

Tag !!

Good Morning Folks !!

How are you all?? Hope you enjoying this month Challenge here with us DCAM and enjoying the Mind boggling inspirations from our Team. Today I have a TAG to share with you all . I always wanted to make one ever  since I bought mine first Prima doll stamp . Well I did try to coordinate my tag with theme but I guess it gives more of Contemporary feel .
Have a look ..


How is it ?? I know not good but fine :P

Close Views 


Yeyy I have used my MIST-RIES to make the background . Now the question that POPS UP in mind will be How did I get this Soft tones of our BOLD VIBRANT MIST-RIES  ?
RIGHT ????

Another close view (textured background)
OOOH.. I just loved it . What do you have to say about it ??

For Background I have Used the same technique which I shared with you in my last month post FLORAL MIST-RY ( you can check the tutorial.) The technique is exactly the same ,I have applied a layer of gesso on my base Tag to lower down the tone of Mist- ries .


And my hand FLOWERS . Seriously I hooked to flower making !!
The white and pink flower is handmade . And I have added pearl to give a look of spray .


I know I am totally bad in coloring :P but learning somehow . I have used a scrap Pattern paper stamped with versamark inkpad over the paper and used silver embossing powder .It gives altogether a different dimension to the stamped dress what say ???

Hopefully I was able to Inspire you all and Don't forget to participate in our this Month Challenge.

Have a Nice day 
XOXO


SUPPLIES USED - 


Friday, 13 September 2013

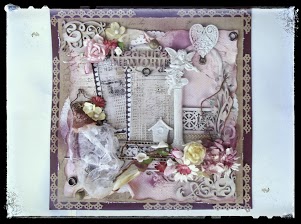
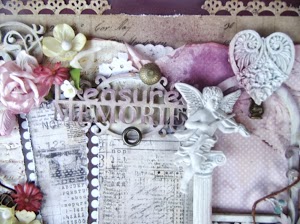
TREASURED MEMORIES - A SHABBY CHIC LAYOUT

Hi friends,


I'm Anita Kejriwal as guest designer for the Dcam challenges this month. It is indeed a pleasure for me to do this tutorial as not only do I love making scrapbook layouts but also because Mansi is a very dear friend.
So I,ve tried showing the making of my project through a video tutorial. As usual, before I write any post, I was very nervous....as if I'm sitting for my exam....lolll......and so please please excuse all the interruptions and wrong camera angles and other slip aways......I ,ve tried to show each and every step in detail, so just bear with me. This post is also picture heavy so just grab some snacks.... sit back....and ENJOY!!!!!
Before I start, let me tell you that this month's challenge theme is 'SHABBY CHIC'. I,ve tried to explain the features of shabby chic style in my video. However thats just a general opinion that I have told you......just a few features and you are free to look at the way you want to see.The supplies for the layout have all come from the fabulous crafts store DIE CUTS AND MORE. This is a wonderful craft destination for all craft addicts as it has the best brands from the crafts world and also a wide selection of each category.
So lets begin.


Don't forget to checkout the Video


I hope you all enjoyed watching this video. Do excuse me if I've missed out on anything. Please do remember that I,m just a passionate crafter who loves learning

Saturday, 7 September 2013

Gorjuss Shabbyness !!!

Good Morning Folks !!

Hope you all doing great and enjoying some fabulous inspirations from my fellow DT's . Well it;'s my turn to inspire you all . I really had tough time to come up with my inpiration project for you all , I am totally bowled over all the projects shared by DT's  so far,  Agreed ?? . Oops!! I forgot to ask hope you enjoying our this month Challenge .

It's show time ..... 
Warning - Picture heavy post !!


How's it ??
I am kind of really nervous and was actually freaking out when I had to color this super cute gorjuss doll. Hmmmm .. It's not that bad what say ?? Anyways , Yeyyy I am totally in love with the gorjussness of these Gorjuss doll stamps .


Just another view !! Well I have used the Bigz XL Frame die to make this cute doll house shaped card . I have used the beautiful Prima papers - Life time collection ,I love these papers , they are are fabulous and perfect for shabby projects or even mix media projects .
                                         
                                                               Side View of the doll house 


Since I was short of pattern paper so I created this pattern paper , Loads of st staming and distressing and masking .I somehow tried to match the pattern paper colors .
Decorated the sides with some Mulberry flowers and handmade flower and butterflies.

Another side view 
 Some more mulberry flowers and handmade flower and super cute tag fussy cut from pattern paper

                                                                             Close - up 

Here's the close shot the stamped images and a peek- a -boo inside my doll house . I have used Mft and Memory box dies . I have colored my doll with Pearlscents colors ,looks absolutely shimmery when seen in person. Have used MS punch to make the banner inside to hold the stamp and doll .


And close shot of my handmade flowers decorated with pearls in the centre . Hope not that bad huh ?? 
Well that was all , I hope I was able to inspire you all . And don't forget to participate in our current Challenge .

Oh oh .. wait a minute - We have extended our CANDY by a weeks time I am sure you don't wanna miss this chance. All the Best .


Have a Nice day 
Love 
Isha

SUPPLIES USED -

Wednesday, 4 September 2013

Shabbilicious Layout with Tutorial

Hi Friends,
Today is my chance to share my inspiration for Shabby Chick with you all... Well i am hooked to making Flowers these days...as most of you must have seen on Facebook...and layouts is becoming my second love... I love making them.... I have tried a lot of new things in this layout ... Here is a Sneak Peak of what I did... And yes... not to forget...I was inspired to make this layout when I saw something similar on Pinterest. This is my Take on the layout.... Here is the sneak Peak Of what I made....


The flowers are made by me... you can learn how to make these Beautiful flowers at the comfort of your home through ONLINE CLASSES. So Distance is not an issue...You may be anywhere in the world.... We can always do a SKYPE session....(Let me WARN you, This is a Picture Heavy Post)

OKAY NOW ON TO THE TUTORIAL
First I took a 12X12 piece of  our Imported CHIPBOARD . (Did I tell you they are an Awesome Quality and very Sturdy to hold all you heaviest embellies , These make an excellent base for clocks as well). Then I took my favorite LIFETIME PAPER collection by PRIMA and tore them vertically in strips .


I then Distressed all the strips using  Tea Dye and Vintage Photo  Distress Inks on all the sides.


I then Stamped all the strips using black archival ink pad and Script Texture Clear Stamp and created a background. I tried with coffee Inl as well...but was satisfied with Black only....


It looked something like this and then I adhered it to the chipboard which gave me a Beautiful Vintage background.


I then Cut out a chipboard frame using my favorite Sizzix Bigz XL Die - Frame  die. and also Engraver Pattern Paper..


Inside the frame I have put Romance Novel Journaling Notecards for the background. And Finally embellished it with MDF Laser cut and a few laces from my Stash 


Then I adhered the frame and my flowers and Foliage along with the Prima Blings available at Die Cuts and More

                                                             A closer look to the arrangement

             
After having made the complete layout I realised this was looking too Vintagy Shabby .......What do you think??? Take a look how it was looking earlier...So to make it complete SHABBY CHICK 

 after completing the whole Layout as it is looking in the pic above ... I added a lil strokes of GESSO here and There and then distressed it with Worn Lipstick distress Ink 
(Sorry I could not take the pics of that, as It was not planned and was a random act ) 
 anyways... this was the Final Outcome...
And Finally I was also satisfied with the look....This is my first attempt on a SHABBY CHICK LAYOUT...Hope you all like it. If you have any question feel free to ask me and Please don't forget to leave me Some love through your valuable comments.I love to read them. Byee for now...Keep Crafting :)

PS. Do play along with us in CHALLENGE #2 SHABBY IS CHIC!