Total Pageviews

Showing posts with label DCAM Critter sheet. Show all posts

Thursday, 9 May 2019

Folder Cards using Envelope Die

Hey guys!

Spardha here from The Lazy Owl Designs taking over the DCAM blog today to share some card-making inspiration. I hope you guys enjoyed our tutorial for gift boxes using DCAM Envelope Die.


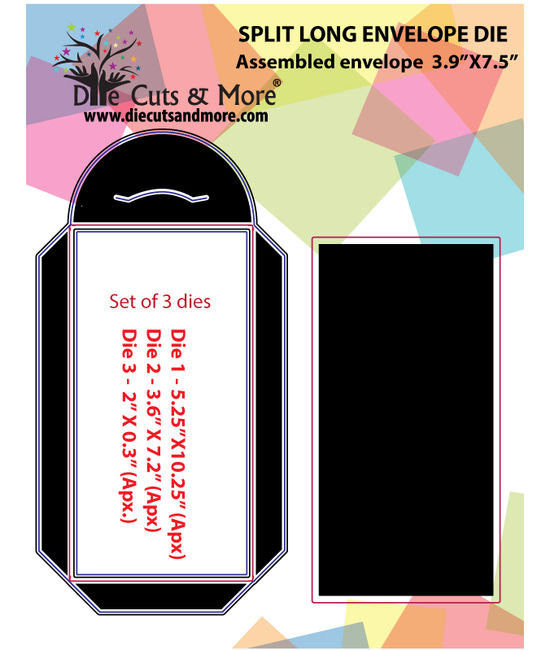
Here is another way of using the Split Long Envelope Die and create beautiful square cards.
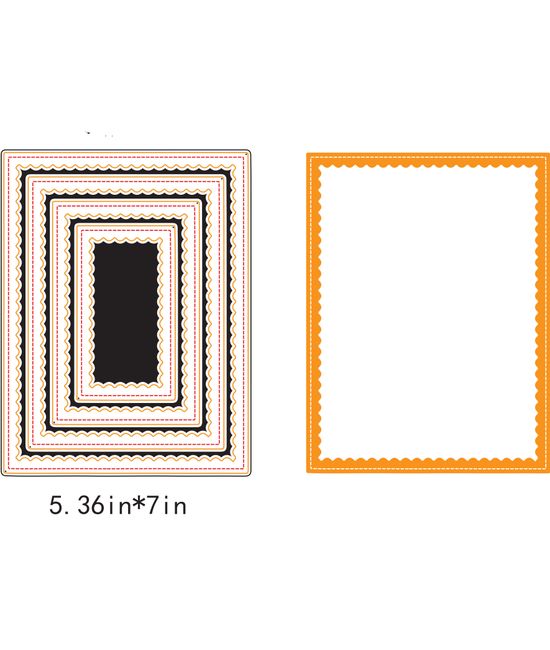
Use your die-cutting machine to cut two rectangles using the dies and remove their side-flaps. Cut the rectangle in half.


I sketched out a quick stencil for you guys to follow, in case of confusion.

Now all you have to do is layer the two cards and paste them together. And you are ready to decorate!
I used the wood-grain embossing die with some brown ink to create a letterpress-impression. And of course, ended up using a LOT of my go-to critter sheets!


I cannot stress on this enough, there are SO many ways you can use these envelope dies and I am still playing around with them!


Hope you guys had fun following this post and share your own projects with us soon :)

Products used (DCAM Store):


Friday, 26 April 2019

Have a mice day!

Hello DCAM fans!
Happy Friday!

It's too hot in Delhi, so I am presenting a sweet creation in shades of soothing blue to chill the day!


I created a very sweet card using a cute mice image playing with a balloon. I fussy cut the image and applied matching distress ink at the edges. For the focus on the image, I randomly applied some DO inks on my sheet and swiped away my die cut scallop rectangle panel along with a frame.
Added so many layers of cardstocks and PP. And the cloud print PP fit so well with this cute mice image I die cut a tag with circles print!


Finished it with some enamel shapes and a sentiment label. And added some bold die cut letters Enjoy in black!


Wishing you a very nice(mice) day!
Will come back soon!

Happy crafting!
Vinita Jain

DCAM Supply List

Monday, 25 March 2019

Layered Wreath Card using DCAM Critter Sheets

Hey guys!
Spardha here from The Lazy Owl Designs to share some more layered inspiration using DCAM Watercolour Critter Sheets.


There is SO much you can do with these beautiful critter sheets. Just by fussy cutting a bunch of elements and it's super fun layering them with co-ordinated patterned papers. 


Using kraft cardstock as the base. Cut out a circle with the same. Layer the cardstock with a patterned paper matt and start grouping these beautiful flowers together. I like to play around with the placement before committing to a perfect design assembly. 


And simply add a sentiment and some bling for a finishing touch. 
Hope you find this project as inspiring as I do with DCAM products.


Products Used (DCAM Store)

Tuesday, 19 March 2019

Beary Creative Gift Tags with DCAM Critter Sheets!


Hey guys!


Spardha here from The Lazy Owl Designs, bringing some ADORABLE creative inspiration for you today using DCAM Critter Sheets *drools*


March is a super busy birthday month for us here so I figured, why not make some cute gift tags and add some sunshine in your life :)


The base of the tags was cut using Stitched Tag Dies and a smaller sized patterned paper used for matting the tag. Loads of fussy cutting resulted in these adorables.
And finally, mixing and matching, adding ribbons and twines and some bling :)


Hope you're having as much fun with the critter sheets as we are.
Don't forget to share your lovely projects with us.

Products Used (DCAM Store)

Thursday, 27 December 2018

Bold sentiments with stitched patterns!

Hello everyone!
Happy Thursday!

Hoping you all enjoyed Christmas with your friends and family!

Now time to create something different for celebrating New Year and I made a love card too. I did the stitching first time on my cards and very much happy with pretty results and the bold chiplet sentiment has truly enhanced the beauty of these projects!!!


Card #1
Celebrate


I created holes to stitch my white panel using a die. It's a double shade thread, created a random stitched pattern and left the centre part to adhered lotus which is a critter sheet and I fussy cut them. Added the bold Celebrate chiplet sentiment. 


Card #2
Love

Again I created the holes on a white panel for stitching. Then I roughly drew a heart shape lightly with my pencil. And using the double shade pink thread and created a stitched cute heart.


Now adhered this white panel on my card base. Added the Love Chiplet with a tiny heart in pink.
Isn't it soooooo cute!!!

Hoping I inspired you!
Have a Happy, Healthy and Prosperous New Year 2019!!!

Thursday, 6 December 2018

Warm Wishes with Peonies!

Hello to all!
Vinita this side!

It's December already! And time to prepare some New year, Christmas or celebrations card to gift someone!

Here is the card I made using Ready to color Peonies 2 critter sheet!


I colored the Peonies with my Chameleon  Color Tones.


Later, I added the yellow-orange Peonies to set my design. 
After coloring, fussy cut them, added some white dots using white gel pen and black detail pen dots too.


Then adhered my peonies on a white card base panel, where I added black stripes with a vellum panel in between. Added the bold Wishes chiplet sentiment along with warm wishes from our home.


 Finished the card by adding clear rhinestones and glass slippers sequins.
Hope you inspired to color yours!

Happy Crafting!


DCAM Supply List

http://diecutsandmore.com/product/ready-to-color-peonies/


http://diecutsandmore.com/product/wishes-word-chiplets/

Sunday, 2 December 2018

With Love from DCAM

Hey guys!

Spardha here today from The Lazy Owl Designs :)
I'm here today, to inspire you with a super fun and quirky card using DCAM Critter sheets!


As you know, there is a wide variety of designs and sentiments to choose from. You can simply fussy cut them all at once and use them in different combinations for a quick card. I complete most of my fussy cutting while watching a show *wink*


Using a black base for the card, I found a gorgeous patterned paper for adding some pop of colour to the matt. Layering fussy cut Watercolour Florals with a sentiment from Sentimental Banneriffic using double sided tape to add dimension.


I added a finishing touch using sequins to complete the final look of the card.


Supplies Used (DCAM)


--- Happy Crafting! ---

Saturday, 24 November 2018

Two pretty cards!

Hello friends!
Happy Saturday!

Vinita here Today, I m so excited to share with you two pretty cards that I created with awesome printed Critter sheets and this time I received some uncolored imaged too:)
Mansi has done a super job again! She has completely created unique and detailed critter sheets set! Pretty Anemones set has uncolored floral images and Humming Bird set has some different sizes of flowers, large and small hummingbirds with different sizes leaves!
My first card is showcasing pretty Anemones! I really enjoyed coloring them and these florals are perfect for any coloring medium!


Card#1
Pretty Anemones


To create my own pattern background, Placed the dual cube stencil on the white surface area and secure it with washi tape or painters tape. Add pattern to your project by blending inks. Gently pull the stencil off from the project area to see the result.


This stencil will help you to create an amazing woven background. Flip the stencil over the pattern and then apply the different color to achieve the good result.

Then I fussy cut some anemones from the ready to color anemones critter sheet and started coloring with some Chameleon pens. Add depth by shading using polychrome pencils of the same color shades.


Die cut some duo leaves, colored them and added some white gel pen dots.


Now I placed the stencilled panel in two different angles with my blooms and leaves. Added the fussy cut sentiment.  Added the fussy cut Congratulations banner from Sentimental bannerrific Critter sheet. Embellished it with some enamel dots.
Love the way it turned out so beautiful! I hope you enjoyed this card. There are a lot of possibilities with this critter sheet Anemones flower!

Card #2
Humming Bird


I started by fussy cutting some floral clusters, leaves and hummingbirds from DCAM Hummingbird critter sheet.


On a piece of heavy white CS, I created a woodgrain background using texture paste and with my woodgrain tool I created the textures and inked it. While it is still a little wet I sprinkled some Mermaid glitter powder for more interest and textures.


That beautiful border on the bottom was created by die cutting one of the dies from DCAM Pierced Scallop Borders dies set.


Isn't that hummingbird absolutely amazing? Seriously, Mansi Thinks of everything!!!
It is so easy to create any scene with dimensions and textures with so many components! And that bold chiplet sentiment Hello is icing on the cake! Finished it off with a shine on sentiment and some gold dots.


DCAM Supply List