Total Pageviews

Monday, 17 September 2018

Wedding cake shape keepsake Box with DCAM

Hello crafty friends!
Iam here with DCAM stores new September release inspiration post..
For today's post  I have made a wedding cake shape keepsake Box. For two tier of cake box I have used sizzix circle dies , pattern papers and iris cardstock and then decorated whole project using DCAM wedding celebrations and flower clitter sheets, hydrangea flower die ,DCAM ice candy glitter etc..
Size of bottom big box is 4.25" and top small box is 3" and height of each box is 1.25" and total this cake shaped keepsake box size is 5"x 6".
On top I have used small easel card base to support couple picture..and all around I have used fussy cut flowers and congratulations banner from same wedding critter sheet.


Thank you for stopping by..hope you have liked my project..if you want to know anything particular do write in comment box or message me.. thank you
Love n hugs
Daksha
Supplies used: DCAM stor
Wedding collections
Hydrangea flower die

Friday, 14 September 2018

An elegant wedding card!

Hello to all!
A very Good Morning!

Vinita here!

Today, I wanted to showcase something special for the newlywed's couple!
 I experimented with several different versions, stretching my dies in a new way, so many fussy cut elements. The Diya die is so versatile, beautiful and intricate with so many beautiful elements to decorate!

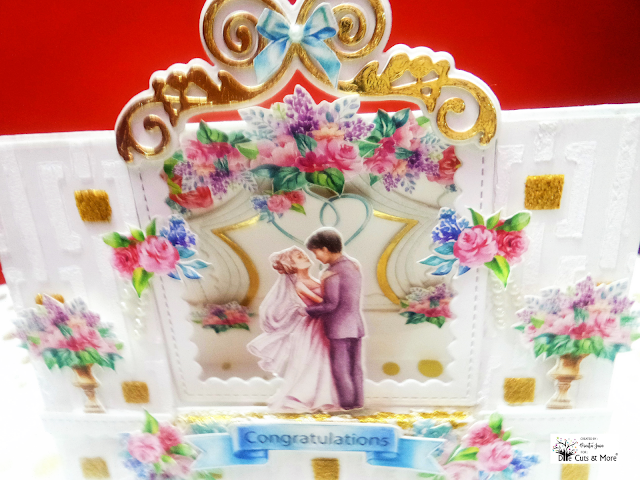
This elegant and pretty wedding card is a result of the latest September release at DCAM! When I received Wedding Celebrations Critter sheet in my DT kit, I fall in love with the stuff, color combinations, flowers, couples, hearts, gifts,  so many cute elements in this critter sheet!!! And I have paired all my fussy cut elements with a hint of gold with lots of delicate layers and dimension!
Hoping I succeeded with this pretty bride and groom with the wedding stage!


 And some pics to make you clear how I created my base using scalloped Rectangle die to create the window part as shown in the pic below. My card base is 400 gsm in white so it cut only the upper part of the card base.


I pasted the inner die cut part at the back side of the card.


I used the Diya die cut elements to create my curtain panel border at the top. I created the curtains too using the same die. I fussy cut lot of elements from the critter sheet.


After die cutting my window I created a stencilling panel using box maze 2 steps stencil to enhance the beauty of this project with a hint of gold glittery squares using white embossing paste and glitter paste as shown in the pic.


Now some more clear pics with all dimensions and layers!


Here is the inside view of the window panel with curtain decoration.


There is a short video:


Thanks for taking a look!

DCAM Supply List with the link ups:


Wednesday, 12 September 2018

DCAM Stencil Scrapbook Layout!

Hey guys!

Spardha here today from The Lazy Owl Designs, sharing with you yet another cool way to use the DCAM 3D stencils!


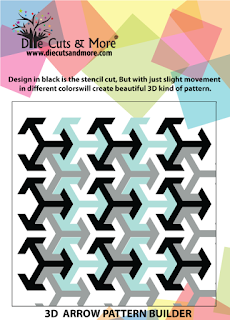
I began by using white cardstock and soft pastels with 3D Arrow Pattern Builder stencil. I am in LOVE with how soft pastels are working out with these stencils!


Then I cut out a circular window from a black cardstock and stuck the 3D pattern behind the sheet.
I coordinated the critter flowers, sequins and pastel colours with the photo I was going to use on the layout. And added a few finishing touches with a white gel pen for journaling.


I ended up using two different sets of critter sheets together but they worked out perfectly.
Hope it inspires you to use your 3D stencils in some amazing ways!

Supplies used:


--- Happy Crafting! ---

Monday, 10 September 2018

Hugs & kisses

Hello everyone 😊

I'm Monika and today I'm sharing my first inspiration for DCAM shop.
After receiving my DT pack I couldn't decided which products to use first as all of them are so beautiful. When I picked few of the critter sheets I was amazed to see this beautiful detailed images, so I had to use them :)


For this round shaped card I cut few flowers and leaves from Floral Fantasee critter sheet and arranged them on the card. 
I decided to add: sending hugs & kisses to finish it off.


Hope you liked my project and please check out other products on DCAM website.


Hugs & Kisses

Monika

Friday, 7 September 2018

Mason jar shaped shaker cards cum gift toppers with DCAM

Hello crafty friends!
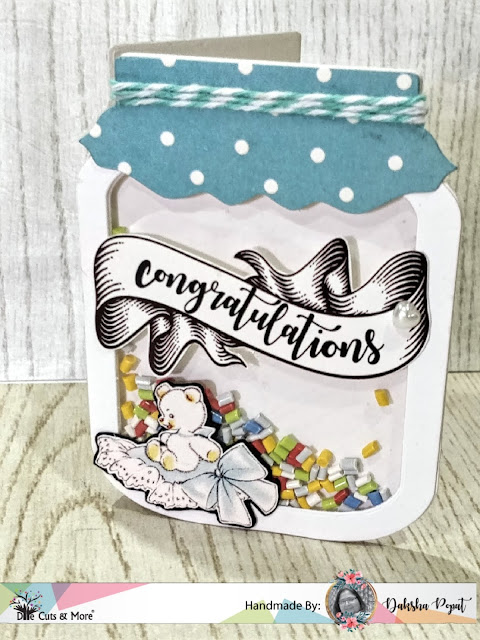
For today's DT post, I have made mini cards cum tags or gift toppers..this you can use it as card or can use it as tag also or you can stick this on your gift.. I have used Mason jar shaker die, 'bundle of joy'  ' sentiment banners' critter sheets and shaker beads etc .. by  DCAM store.
This dcam mason jar shaker die is so cute n perfect in size.. that you don't need to think much just die cut all pieces and assemble and your card is ready...ready size of my card is 3"x4".❤️


Thank you for stopping by..and hope your are enjoying my inspiration post using DCAM stuff.
Love n hugs
Daksha
Supplies used: from DCAM store


Wednesday, 5 September 2018

Floral framed Birthday Wishes!

Hello dear friends!
Vinita here!

We are welcoming wonderful September. Are you ready for the change of season?
 I love the colors of early fall. Little by little Autumn bells are ringing and with it, in my mind, I created a fall color background on this dimensional floral framed Birthday Wishes card!


I thought I would share a few steps by step photos how I created this floral frame card.
Firstly, I paired a variety of watercolor florals with leaves out of critter sheets, fussy cut them.


Die cut the biggest inverted scallop rectangle frame 3 times, Fence and hills 2 times out of white CS and wild grasses from black CS.


I embossed one of the fences in woodgrain, also inked it with DI. Added that fence to another one.


Distressed the embossed raised parts of the fence. Then blending green inks on the hills. Added some droplets of water and removed the excess using a baby wipe.


Tip: Always take a rough pic before arrangement or final output. later on, I changed my mind and put all the elements on one side only.


On a white CS, I created a background with blending of some Distress Inks. 


 Once all the elements of the scene were finished I began assembling them. The fence was attached to the card base section with thin strips of mounting tape. Next the hills with a scrap piece of grass border and layered the last border hill to create my ground using a double stick tape with some black splatters.


Arranged the florals with leaves and foliage using wild grass and tucked them behind my flowers and leaves with full of depth and dimensions on one side of the card. And I used every little scrap pieces in this creation:)D. Added the 3 layers of the inverted scalloped rectangle to create a window scene using double stick tape.
Fussy cut the sentiment along with some florals and leaves and added at the right side corner and distressed the banner edges for more interest.


Then seeing the smallest stitched tag die, I got a creative bulb idea to convert it into a cute envelope as the picture says all. Added some faux stitching lines using a white gel pen.


Finished it off with some green droplets here & there, glitter dust in flower centre and a cute butterfly. I think it is turned out perfect with florals and sentiment! We don't have fall colors in Delhi and it is something I missed here but I love fall colors. I hope you have found my step by step pictures helpful!

Here is the inside view to write the message!


Hoping this project gave you some ideas to create yours! Super fun and easy!