Total Pageviews

Showing posts with label handmade. Show all posts

Thursday, 10 November 2016

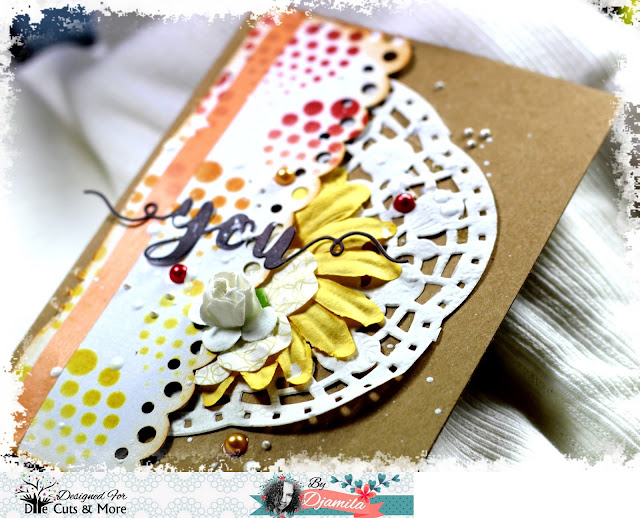
Cards "You"


Hi!

Djamila here today to present you a couple of cards made with the beautiful Die Cuts and More stencil.I choosed to use some of the november challenge colors:


Here are my cards:


And the second one:


Don't forget to participate to the challenge:

I used:


Thanks for visiting and comments!


Thursday, 19 December 2013

CAS Expressions !

Hello,

Good Morning folks, hope you doing good . This is Sachi here and i am sharing my CAS cards for the 2nd time.Well i am still intrigued by CAS cards and i have concluded that making a simple card is the most difficult  yet got to say its funn to create these .

When i started this one I hoped i could finish this one fast ,it did went quick but not as quick i thought it would.I have followed a simple design here , hope the look  is not too much or too little and i have managed to get it just right !And i don't really agree that CAS cards cannot have embellies on them , i have tried to highlight the word celebrate by adding sparkle to the flower center , hope it does scream that !


A close up of the doily flower, I have added the superfine silver glitter in the center .


For the 2nd one i have tried to bring out the joy of having an adorable baby girl so here i have used the pram as the focal point . Its handmade using the spellbinders lacy circles, pattern papers and some embellies, since I wanted it to stand out so i have layered it on a white base . To add more detail i have punched the embossed layer with MS hearts confetti punch , hope i havent broken the CAS rules too much here! LOL


And here's a closeup view -


And here 's both the cards together-


 Hope you enjoyed seeing my cards, do let me know if you like them .And Don't forget to participate in our current CHALLENGE # 5 CAS- (Clean and Simple) CARDS .

Thanks for stopping by ,
Love,
Sachi


Sunday, 17 November 2013

Drawer Easel Card

Hello everyone! How are you all doing? Well its November my favourite month of the year all thanks to the good weather n becauseee its my Birthday Month :D
So today i decided to make something for myself as a birthday gift lol see this is what happens when you are a crafter n you want to recive something handmade especially created for you :P
Because i am a vintage fan i decided to use the Gorgeous Prima Divine paper pad!! Its a fabulous paper pad lots of pretty vintage prints!
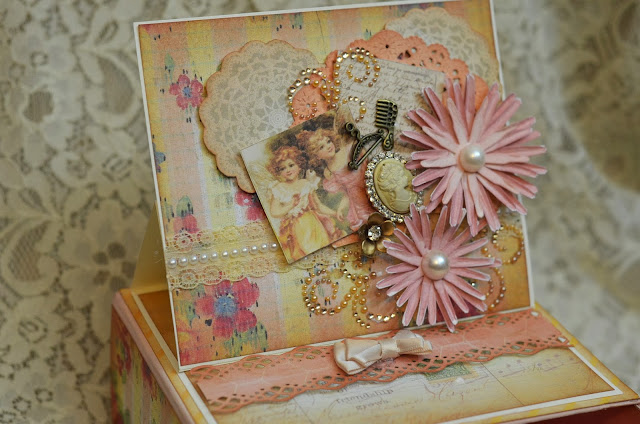
So here is what i have made. Its a Easel card with a box. I upcycled an old box adding a card on the top.


Isn't it gorgeous?
I've fussy cut some elements from the paper pad and added to the card. I've used some prima bling aswell. Our store has a lot of colours in it, Do check out Our facebook page for the same! I've made some flowers using memory box aster die on which I've lightly brushed some gesso.

Hope you all liked what i made.
Thanks for stopping by

Hugs
Anchal Sapra


Saturday, 9 November 2013

Pop up card

Hello everyone!
How are you all doing? I hope all of you are enjoying the gorgeous creations my fellow DT's are getting to inspire you all! The theme for this month's Challenge is 3D INTERACTIVE CARDS!!

To inspire you all i am back with another creation.

Now you all most be wondering how can this simple looking card be 3D!! Hehe!
Its time for some magic!


Here's a side view showing the pop up.


Isn't it pretty?

How did you like my twist to the pot card? I've made the simple pot card and added it to a pop up card. Magic!! :P

I've used Graphic 45 Secret garden paper pad! Its a gorgeous paper pad! the prints are lovely and there is so much to fussy cut! I just love it!
I hand cut the pot in such a way so that it forms a pocket with a tag inside which i decorated. I've used joy crafts flower die and snipped the petals a little and inked them using Mustard seed distress ink. I've cut some leaves from the paper pad and embossed them. I've used 2 different  punches by Martha Stewart! Our store has a wide variety of MS punches! Do check it out!

Hope you all liked my creation! Dont forget to be a part of this Months super fun Challenge!

Thanks for stopping by! Stay inspired Stay Creative!

Hugs
Anchal Sapra


Wednesday, 30 October 2013

Wooden Door Knob Hanger Tutorial!

Hello everyone!
Its me Anchal here with a brand new video tutorial for you all!
So first let me show you what we are going to make today n then make an announcement! :D


Here's a close up


So now coming to the announcement!
I'll be giving away one door hanger to a lucky follower of our blog as a thank you and diwali gift!!


  RULES:
1.Like , share and comment on all our posts i:e our blog posts as well as posts on Facebook keeping settings to PUBLIC.
2.Like our Face book Page.
3.Become a follower of our Blog.

The winner will be selected by Random.org 
To enter yourself for the giveaway please leave your name below!


Now coming to the video here it is!


All the products used are listed below. Hope you all like it!
Do drop some love and feel free to seek answers to your queries.

Thanks for stopping by
Hugs
Anchal Sapra


Wednesday, 23 October 2013

Happy Bright Cards!

Hello everyone!
Hope you all are enjoying the lovely post my fellow Dt's are getting!
Such fab projects and tutorials are the cherry on the cake!
So its my turn to share some cards with you all today. I've used Prima Anna Marie 6*6 Its a gorgeous paper pad!
I just love how thick are prima paper pads and the prints are so cute its a combination of brights and vintage prints which is awesome!
I've made two cards and one mini album! Here are the pictures.

For the first card I have done some fussy cutting and layering and added glossy accents to the elements, I just love glossy accents its one of my favourite product to use.

Next I have made a four fold mini album using a 4*16 inch paper scoring at 4,8,12 and using a corner rounder to round the edges.


 I've added a die cut with a sentiment inside, these albums look cute and can be used for pictures and messages.

Here's my next card .Arent't these prints cute? I so love them

I've layered the pattern paper with card stock and added die cuts.
Hope you all like these ! :D
Thanks for stopping by!
Dont forget to be a part of our current Challenge #3 Picture Inspirations and get a change to win some yummy goodies!

Hugs
Anchal Sapra


Sunday, 13 October 2013

Pink n white Gift tag

Hello everyone!
How are you all doing? I hope you are feeling inspired with all the fab projects my fellow DT's are showcasing here.
I always wanted to make a white creation with just a tinge of colour and this challenge gave me the push to finally make one!
Well i made a tag but i wanted to do something different insteading of having a white base with coloured flowers now further delay let me show you all what i made!

I layered the tag withe the background i made using my MS Scoring board and then decorated it using liquid pearls doesnt it look fab? Next i made the rose using the Joy crafts flower1 die. I learnt this pretty flower from Mansi di! Thanks Di for teaching me i am so in love with these! I next covered the edges with glossy accents and added diamond dust I hope you all know how much do i love diamond dust! I've used my favourite spellbinders Floral ovals and distressed it with Victorian velvet. i can never get enough of this die its so versatile and goes really well with floral creations its a must have! I've used some pattern paper from my stash and punched it using Xcut punch.

Here's a close up of the flower!


Here's a close up of the pretty background!


Hope you all like it!
Thanks for stopping by!
Anchal


Monday, 23 September 2013

Drawer Box

Hello everyone!!
Hope all of you are having a good time reading the awesome posts at our blog!
Today i am here to share a tutorial with all of you!
This is going to be a picture heavy post so sit back with your favorite drink and relax!

I've made this drawer box. How's it??


INSTRUCTIONS:

Step 1- MAIN BOX

Cut a piece of 12*6 1/4 piece of cardstock.
Score this at 3", 6", 9" as shown below.


Step 2- DRAWERS
Cut four squares of cardstock measuring 5 7/8" * 5 7/8"
Score these at 1 1/2" on all four sides


Cut the 1st score mark on two sides as shown below.
I like to taper and shorten the flaps a little before gluing - this is optional.

Glue each drawer together.


Step 3- DRAWER PLACEMENT

Lay your main box scored piece down flat and then align and glue the drawer to the very top edge of the left panel repeat the same for the bottom right panel.

P.s- the tricky part
Now position the other two drawers. Position one drawer to the panel adjacent to the left top drawer just below the top drawer. Position the remaining drawer to the panel adjacent to the right bottom drawer just above the bottom drawer. Once satisfied glue them and fold the panel to check if they are aligned properly.


Step 4- THE LID

Cut a 5"* 5" piece of cardstock and score it at 1" on all four sides , taper and shorten the flaps and glue together.


Now the base is ready. Decorate it as you please!

Hope all of you enjoy the tutorial! 
Thanks for stopping by!

Hugs
Anchal Sapra