Total Pageviews

Wednesday, 25 January 2017

BEST Wishes!

A Big Hello to my DCAM Fan, Piyanki here with some brand new projects. Until then I hope you are enjoying the various projects my fellow DT members are presenting and getting inspired to make some for yourself.

I have 3 cards for you, they are simple and easy to make. I have used some of the newly launched dies for the projects. Will also list the link so that you can refer to when needed.


The Background is a water color background with some splashes. I have used the Best Wishes Script Die and the Bold Xl Alphabets for this.

Did another shade of the same design as below.


Both together looks so soothing. The flowers are from Itsy Bitsy.


The second project was fun to make, rather I always enjoy making shaker cards.


Here I have used the Inverted Scallop Square and the Basic Square along with the Script Die and Its a Boy Mix.


Hope the projects are inspiring enough so that you can give it a try. Do share your comments.
Thanks for stopping by.

Product Used


Monday, 23 January 2017

Inverted scallop circle die

Hello friends,
   kavitha here today.I am sharing two projects using "Inverted scallop circle die".For my first card i created water color background using dylusion sprays.Created layers using inverted scallop circle dies and added some layers of flowers and leaves


Second project is a vintage tag using prima "Tales of you & me " collection .I have used the inverted scallop circle dies to create the layers,used both black and pattern papers to die cut the circles.


Supplies used:


Hope you enjoyed todays post.
Thank you for stopping by,
kavi


The website is updated with a new look and is ready to take orders from USA, Canada, Guam, Mexico, Australia and New Zealand, all other countries will be added soon. 
Thank you so much for playing along with us and have a great day. Please follow DCAM and the team on various social media platforms. 

Friday, 20 January 2017

Stampoholic Technique - stamping with fun foam!

Hello crafters,

my post for today is all about using our dies to create stamps and stamping them with the Stampoholic. In case you want to know and see how I created this card, please feel free to watch the video I´ve made for you!

First of all I die cut my stamps to be out of fun foam. Then I taped a piece of acetate (you can use paper, if you don´t have any acetate) on the lid of my stampoholic. Later I glued the fun foam on the lid of the stampoholic, on top of the acetate.  


I prepared my piece of water color paper to be ready for heat embossing and stamped my images with versamark ink. Then I used clear embossing powder and heat set it with my heat gun. 


After heat setting I taped the piece of watercolor paper down so it doesn't worp with that much of water I´m going to use. I used blueprint sketch, wilted violet, shaded lilac, water and a brush to color the background in. I worked in layers and between each layer I heat set the paper. 


To Finish the card I cut two stripes of white paper and put some stitching on the edges. The sentiment is stamped with a black pigment ink and clear embossing powder over some vellum. The you word die I die cut four times from black yardstick and glued one on top of another. I coated the you sentiment with wink of Stella clear glitter brush pen and glossy accents and ofer the card I´ve placed some cores droplets. 

I hope you enjoyed my card and ideas for today and until the next time I hope you have a wonderful week. 

Please don't forget to visit us at or other social media networks and I hope you enjoyed my card.


DISTRESS INKS

CLEAR WINK OF STELLA

Thursday, 19 January 2017

Gift Box with Envelope Die

Hi Friends!!!
Its Mansi again, How have you guys been.. well I have been MIA as usual but lately 2 things have really inspired me to craft. first is the ZIG MARKERS and secondly Our new DCAM ENVLOPE DIE. I loved both the products so much that it got me to crafting again... And not to forget Rajni Chawla ( Aunty) , she is an inspiration to all of us. 

Zig Markers are SUPERB... I mean they are no fuss pens... the blending just happens.. you do not need to be a painter and finally I was able to color.. yayyy...
And what do I say for our enelope die, just I wanted to pat my back for making this... Its the perfect size for money envelope. and guess what.. I even created box out of this. I enjoyed making that so much. This will be a picture heavy post.. so grab a coffe and sit back.. I hope I can inspire you a bit... 

Here is the top view of the box. 

What I did was I took 4 envelope Die cuts and joined them together with the hinge. I ct 1 hinge of each envelope and joined all of them together. 


 I then Folded the bottom flaps and pasted them with the glue. I cut 2 pieces of chip boards and pasted them inside& outside of the bottom of the box, sandwiching the bottom flaps in between the 2 chipboards.

  I then cut 4 chipboards matching to the size of the walls and pasted them inside walls of the box to make it sturdy. 

 I then finished the box using some LawnFawn Pattern Papers and some painted critters which I adhered with Zig 2 way Pen. Its awesome adhesive to put small items. Blue when wet and clear when dry; use 2 different ways. For a permanent hold, apply glue to 1 paper surface and adhere it to another paper surface. For a repositionable hold, apply it to a paper surface and allow it to dry clear before adhering it to the other paper.


Thanks for Visiting.. I hope I was able to inspire you. 

SUPPLIES USED
Zig Real Brush Markers


Envelope Die


Double Stitched Borders + Stitched Card Shaper Dies


Inverted Scallop Circle Frame Dies


           Somebunny


Zig 2-Way Glue Pen


Monday, 16 January 2017

Envelope Die Review and inspiration by RAJNI CHAWLA

Hi Friends,
This is Mansi (owner and operator of DCAM STORE) after a long long time on our blog today. Rajni Chawla the name itself needs no introduction... All of us are well aware of her outstanding trendsetting work.. Today we are privileged to have her on blog reviewing our own Envelope die and trust me guys another trend is about to set on this blog itself bu none other than Rajni Aunty (As I fondly call her) . Over to her ...


Good morning crafty friends!!
Firstly wish you all Happy 2017!! May you all have a fantastic crafty year ahead!!
Secondly, I am feeling honored to be on DCAM BLOG to inspire you all. I am absolutely grateful to Mansi for approaching me and sending me her newly launched dies. I really loved the new Envelope die. The tradition of gifting money in envelopes to give the shagun remains prominent in mostly all occasions in India. Half of my life I have worked as a trousseau packaging designer and I very well know the move of envelopes in the Indian market. Though, from the past six years I have been into paper crafting fully and have stopped taking bulk orders for the same sometimes due to my tight schedule and sometimes due to health issues.  But designing them for teaching purposes has always been at the top of my list. I really always wished to have a die in hand so that I can cut the envelope in a single go and that too from any paper that I already have in my stash.
The Newly launched DCAM Envelope Die is just PERFECT for customizing all your needs. The high-quality steel die cuts perfectly well and give sharp and neat edges in a single go with beautiful stitched edges. The die cut has already the scored lines, you just have to score a little more for perfect creasing. It's a big die measuring approx 9.5"X8.5" so it is compatible only with larger die cutting machine like Big Shot plus, Gemini, Cut n Boss, Bigshot Pro etc. You get 2 pieces in a set ( coverup Tag+ envelope die). This die is so versatile that not only envelopes but you can also create many other scrapbooking projects with the same. Today, I will be only focusing on a variety of envelopes.  I have used this die in different ways to create many different envelopes using various paper craft techniques and supplies available in craft market now a days.
Here, I go with my latest creations...
Mind it.....it's a picture heavy and a long post. Sorry,  I could not resist myself using DCAM dies again and again!!
My first set of envelopes might give you a pleasant shock.
Yes....something not my style of work, actually!!
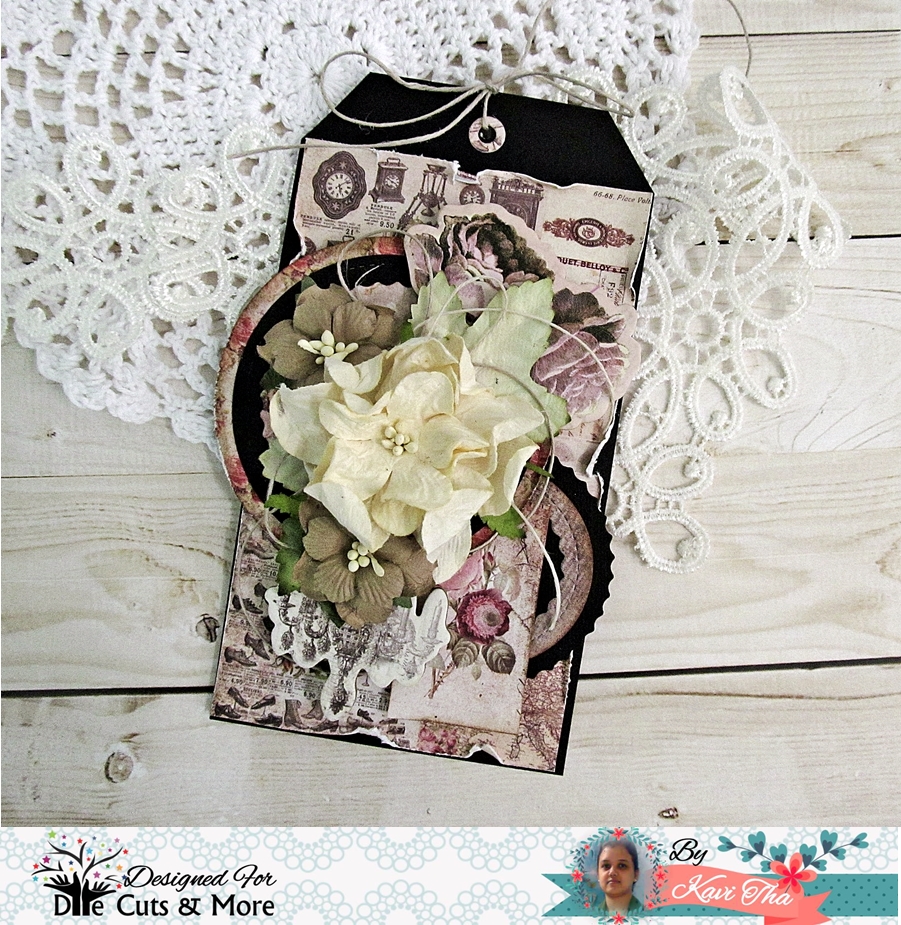
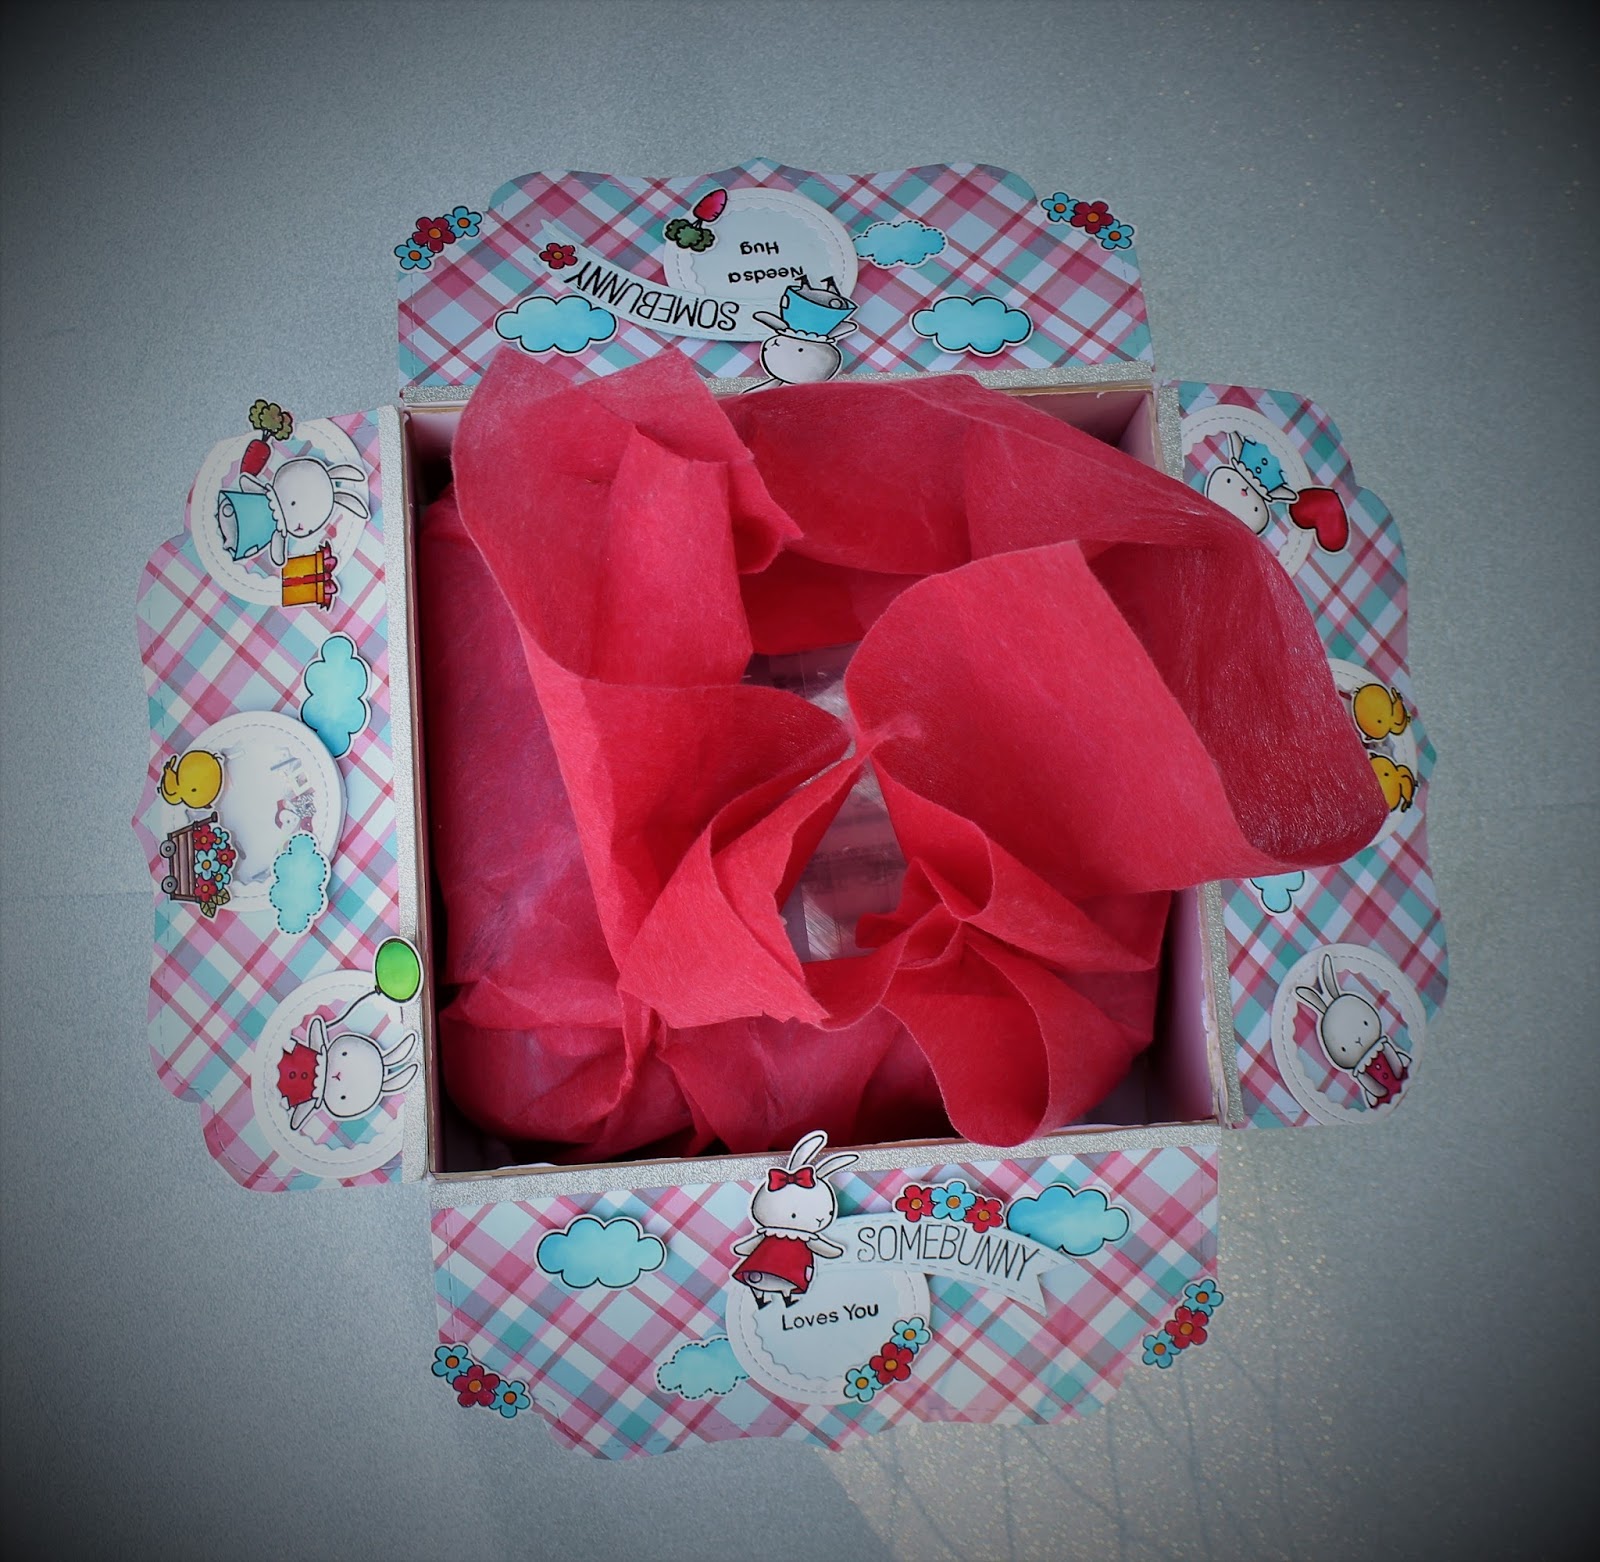
This is really something totally out of my comfort zone. I so wanted myself to give a little new style to my way of crafting. Mix media, 3D paper flowers, birds, and bright colors have always fascinated me and I have always worked the same way. Painting cute little figures and using them to create clean and simple cards or envelopes was always on my wish list. This is my first try to these. Hope you like them the way I loved creating them.
I have mixed and matched DCAM, Double Stitched Circle Die, Double Stitched Rectangle, and Double Stitched Square Die set to create windows for these envelopes. The striped pattern paper used is from Paperecious. The stamps used are from MFT. All the windows are see through and have acetate sheet. Sorry for the glare that you see in the pictures. All the images are painted using Zig Clean Clear Markers. You can find a huge variety of Zig Brush Markers on the DCAM site


For the second set of envelopes, I have used the tag die for creating a belly band around all the envelopes. The belly band has a joint of acetate paper on the front edges. I have used Altenew layered stamps to decorate my envelopes. A huge range of Altenew stamps is available in the DCAM store.  The backgrounds are all created using distress inks and various stamps.


If you are not at all a stamping person you can simply decorate the belly bands. Here is the picture how my envelopes look from the back side without stamping. The simple yet so elegant and matching edge makes it look more fantastic.  Options are endless.


Few more clicks from different angles of the same set....


I am a kind of a person who can't resist stamping. I have a good collection of ready backgrounds and embellishments. For next 2 sets of envelopes, I will be using the backgrounds few of which I created while teaching in my workshops.
This set of envelopes showcase the usage of stamped tags to decorate the envelopes. I have used stamps from Mudra, Hero arts and Impression and Obsession. The base envelope is also fully stamped and colored. The stitched lines of the die, adds an extra beauty to the backgrounds.


And the last and final set in which I have nested the tag die to cut a huge window in the center of the envelopes. Also, I have used an extra tag to create another style of belly band around the envelopes. I kept one envelope simple with beautifully colored stamped images with Zig Clean Clear Brush Markers and the rest two shows a background created using distress inks and stamping.
Hehehehe...Could not resist
Could not resist myself from using my old 3D style of stamped and layered flowers.


That’s all from me today!!


All the supplies used from DCAM store are directly linked to their website for your reference. I hope, I was able to inspire you a little to pull out your supplies. Do visit my blog Timeless Creations for more inspiration and leave some love.

                                                                          SUPPLIES USED

All supplies from DCAM STORE
Altenew Stamps and dies

zig clean-color real brush marker-60pkg


 Double Stitched Square


Double Stitched Circle Die

Envelope Die
Double Stitched Rectangle